I bought this double kit (kits of two vehicles are included) in 2007 from a trade section in a forum. Up-armored Humvees were in fashion back then, featured daily in the news – seen on patrols, guarding “The Green Zone” and all that. So when the opportunity came for me to try a Dragon kit of a wheeled vehicle with all the bells and whistles in the box I jumped in. So what’s under the cover of kit number 7295?
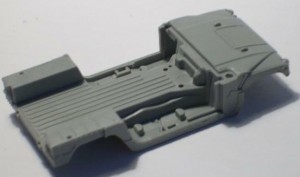
The first thought when looking at the kit parts was “Whoa, that’s nice!”. The precision of the molding on the new parts for the armored version were something I was seeing for the first time. Basically you get the whole lower portion of the vehicle (sans frame and suspension) in a single, separately bagged grey plastic part – “sprue” B. The additional armor on the chassis appears to represent the prototype vehicle configuration properly. The nuts and boltheads that keep the upgraded armor on the vehicle sides are also present – joy to rivetcounters and brushpainters’ nightmare.
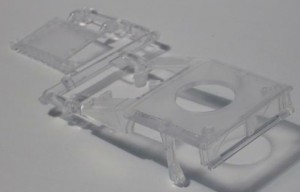
Sprue D holds the two main vehicle superstructure parts. Windshield, cabin roof with a circular hole for the weapons station, side pillars, superstructure of the cargo compartment constitue one of them, the other being the two-way-opening cargo door on the sloped back of the vehicle. Regrettably the inside of the roof is missing the metal supporting frame – the roof is flat on either side and really thick. (If you are interested in re-creating the frame on the inside you will either have to thin the roof an scratchbuild the details, or cut the roof and fabricate the internals.) The whole affair is molded in transparent plastic. There’s a very fine texture on most areas (will certainly help the paint to stick), but the windshiled is perfectly smooth and clear – bar the molded-on wipers (which as is immediately noticeable are way too long).
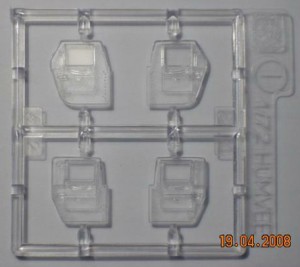
4 separate doors are molded using the same transparent/clear material (sprue I).
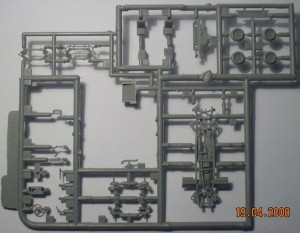
Sprue A has the basic frame of the vehicle (part 1) with molded-on structural details, driveshafts and exhaust. Also found here are suspension parts, wheels (loved them), seats (very small and very flat!!!), the protruding armored front grill, lower portion of the cargo door, two non-transparent blobs that represent the headlights, some internal fittings and a part that has to be the engine + radiator. Ungainly as it is, this last thingy (shaped far from the actual motor/transmission section) caters for the correct “marriage” between the basic frame and the vehicle’s lower half (“sprue” D). Beyond that installing it will allow you to avoid the see-through effect should you decide to peek through the front wheel arches.
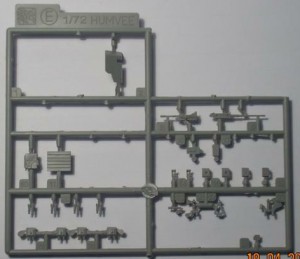
Most of the armament, gun shield for the rooftop weapon station, front IR ID panel (too thick, make your own from foil) and smoke mortars + their mounting brackets reside on sprue E. If you wanted to arm your infantry section properly after checking the part plan – look elsewhere. Despite the fact DML’s instructions have most of the parts on that sprue shaded out as “Not for use” as if they were still in the box on my sample they are all cut off. The Mk.19’s ammo boxes had two large sinkholes on either sides, so the half-hearted molded-on detail on my examples fell victim to the sandpaper.
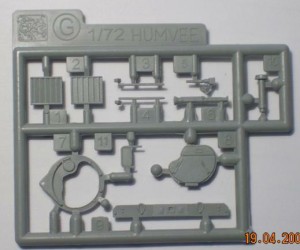
The actual weapon station for the M1114, rear fender, the side IR ID panels, an air filter, an antenna base and what I believe is an AT-4 anti-tank missile are found on sprue G.
At first I was absolutely in love with the detailed protector pattern on the tires DML provides (shown as sprue C on the part plan). The mould halves were displaced when they made the ones for my kit though, and putting them on the rims turned out to be a bitter fight.
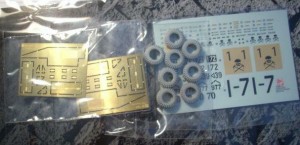
Ah yes – the etched parts… The two identical frets are labeled MA and have 13 parts each. The biggest one (part 4) is the bulkhead between the combat and cargo compartments. Basically DML instructions have it placed vertically, but reference pictures show it canted, following the slope of the wheel arches. It also lacks the ribbing on the inside of the troop compartment and what is probably a part of the air conditioning (even those vehicles that don’t have the two-fan assembly on their backs feature some kind of conditioner). Then there are the two identical hinged parts that sit on the top of the cargo compartment (one of them sits upright – the triangular parts 1 and 2 cater for that) and their hinges (6 total). Two more parts that go on the armored grill complete the picture.
More in the build article.