Articles describing the process of building a scale model. Include discussion of techniques and materials used, issues encountered during the build, and workarounds.
Last time I reached the point where suspension arms were set in place but no wheels were added. First let me take you back a little and show you the bottom of the hull with some suspension detail.
As you can see we have a pretty busy suspension set and this is positively something you want to take your time on. Consult your references on the position of the arms, as I had mine too folded in which caused negative consequences with track runs as you will see shortly.
The main point is this is a very detailed kit, and the only ejection pin mark you’ve seen so far is on the inside of the commander’s hatch. There are no more, period.
Last night I shared some details of the test shot. Tonight I am posting a few images of the build process.
As you have already noticed this is a complete kit, not a short run one, with a lot of parts and excellent detail. Despite being a test shot the set that I have fits very well. What you see here is bare plastic and glue with the minimal cleanup required so parts fit. No filler or primer was used.
I started with the turret. The locating pins and the shape of the guiding surfaces helped mate the upper and lower part nearly perfectly. I used a bit too much glue, so needed to clean up a bit.
Admittedly I couldn’t wait to start building the kit, so here’s a bit of progress.
Detailed add-on armor for the upper glacis with wave deflector and towing hooks added.
On the second image notice the edge that aligns the add-on armor with the upper glacis (parts reversed to showedges).
Exhaust (3 part assembly) glued in place. Another 2-part assembly (fuel tank for laying smoke screen) covers the exhaust on top.
The bulldozer blade added to the lower glacis. The sprue gates are mounted between the actuating arms, so I broke one of them trying to clean the part up…
Step 1 – assembling the chassis. You will notice that the radiator group is integrated with one of the spars and is glued here. Almost right behind it is part E41 – the notch in its middle should point to the rear and up. It’s one of the attachment points for the engine block. My advice: align and glue all the spars to one of the girders first, then attach the second one.
The small subassembly in the lower right of step 1’s diagram is the engine alternator, used in the next step.
In Step 2 you will assemble the engine and gearbox. They are both very inaccurate in terms of shape and detail, and the fit is less than good. Ridiculously there is a driveshaft between the engine block and the gearbox – the designer is obviously no a driver.
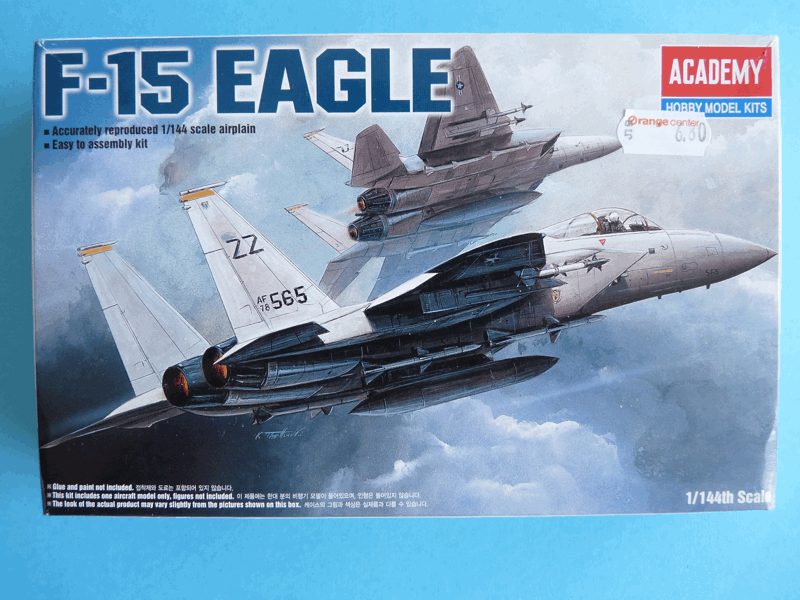
It’s been some time since an aircraft has been featured on this site, so here’s one completed last year. It’s LS’s ancient 1/144 F-15A, later packed by Academy/Minicraft (and perhaps a few other companies. Inside you will discover a rather schematic scaled-down version of the famous aircraft. Panel lines are engraved, but are deep and wide, especially so in the vertical stabilizers.
There are no pylons whatsoever. Armament is limited to 4xAIM-7 Sparrows, there is no centerline hardpoint/wetpoint with fuel tank, and no trace of Sidewinders at all. No cockpit is provided, there is a transparent canopy that covers the nothing underneath. No probes or antennae whatsoever, and you can forger about the dropped flaps on the boxart.
Looking for references for the SU-152 brought about the conclusion that this SPG was indeed a rare beast, and is even harder to find today. While there’s a lot of ISU-152 that were remanufactured to the M and K standards, the KV-based subject was not as lucky: there are very few survivors, even fewer are in presentable condition, and none appear to be able to move on its own.
Books on the “Beast killer” are also few and far between. I was able to find Wydawnictwo Militaria’s “SU-152” (332). Beside the examples pictured in the book (pretty devoid of any fittings, really) there’s another survivor in Kubinka, but since it cannot be photographed from all sides you’d need to rely on a very few images with scarce detail that keep repeating in all books on the subject.
OK, after showing what’s in the box let’s see how to build this beast of a kit.
First, I glued together the hull halves and added the main fenders. They are way too thick for the scale and after being measured were chopped off.
Next step – fill the trenches where the former fenders join the upper hull, and sand the sides down until they are smooth.
Hull filled and sanded
Details will have to be restored…
Fabricate the new fenders from scrap metal – here 0,1mm brass sheet cut to size and bent. The bend is sort of uneven, which is fine considering this is a tank.
First thing to do is to get rid of the molded-on tools. Considering the absurd ideas to make the hammer our of 3 layers of PE and the jack out of 9 layers – some tools were replaced with items from the Attack’s set “Implements and tools”, and I kept the jack almost stock. For the time being I glued on the retaining PE clasps and straps for them and the tow cables.
Stripped from the tools – PE added
Aside from the molded-on tools and the symmetric turret there are few other issues with the Revell kit:
– directly sticking the spare tracks to the turret walls – there are brackets for this on the actual machine – I used PE items form the Part set.
– the gun that is very crudely molded in one piece together with the muzzle brake – replaced it with RB Models item 72B26 turned aluminum barrel with bronze muzzle brake. Since the barrel is turned there are visible traces from the lathe on its surface – I sanded down with 800 and 2000-grit sandpaper.
Since I actually did build the thing about a year ago, I’ll post my thoughts about the construction sequence, and especially about the instructions and some peculiarities of the kit.
There are 23 construction steps and though they are logical I built my example in a bit different way. Also, I noted some errors I am discussing below.
Step 1: wheels – lots of them. Assembling the front wheels is no problem. The drive sprockets are handed (different) on the actual machine, but not in the kit. Dragon has issued you with 2 identical assemblies.
This build is special for me. The kit was purchased, started and completed in just one month, which is a first for the past 20 years or so. I wanted to postpone the clash with it, but I could not resist.
The first thing you should know is that you need to forget most of the modelling stuff you’ve learned over the years. Since the model is a fast build/snap kit:
– DO NOT DRY FIT PARTS, or keep it to a minimum. Fit’s so tight on some parts you won’t be able to disassemble what you put together.