Looking for references for the SU-152 brought about the conclusion that this SPG was indeed a rare beast, and is even harder to find today. While there’s a lot of ISU-152 that were remanufactured to the M and K standards, the KV-based subject was not as lucky: there are very few survivors, even fewer are in presentable condition, and none appear to be able to move on its own.
Books on the “Beast killer” are also few and far between. I was able to find Wydawnictwo Militaria’s “SU-152” (332). Beside the examples pictured in the book (pretty devoid of any fittings, really) there’s another survivor in Kubinka, but since it cannot be photographed from all sides you’d need to rely on a very few images with scarce detail that keep repeating in all books on the subject.
Even after building several 35th scale Dragon kits, this Bronco offering seemed a bit intimidating. The sheer number of sprues and parts turned into a bg question mark in my head – will I be able to build the kit as it deserves? There are many parts parts that can moved, or be posed open/closed (tracks, hatches, gun), which further added to the confusion. I took some time to plan my building and painting sequence to ensure I could pose the parts, and from then on it was dry-fit, dry-fit, dry-fit.
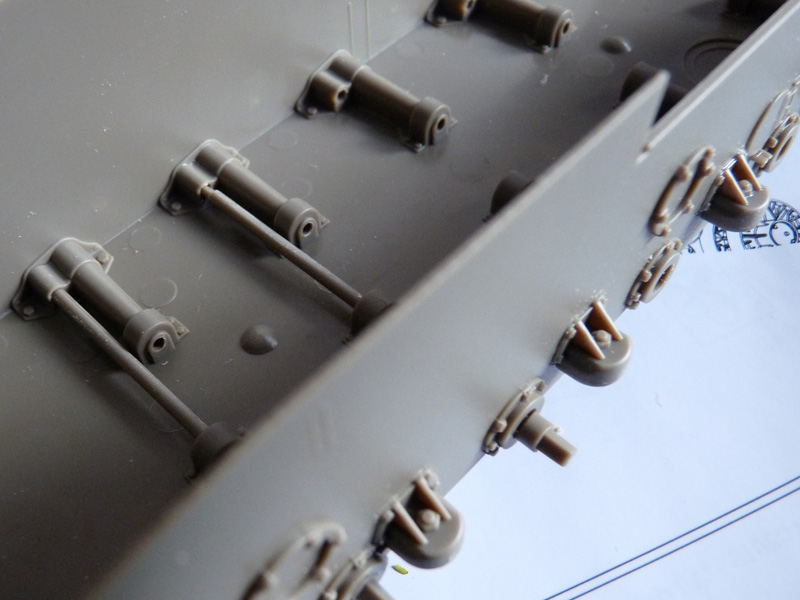
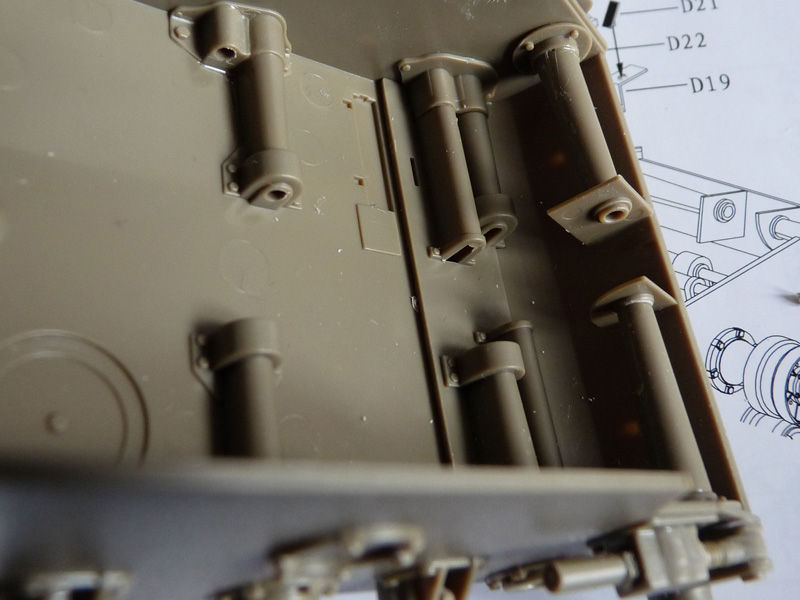
Naturally I started with the hull tub, adding details on the outside – suspension arm travel blocks and track tension adjustment mechanism. 6 torsion arms locks per side – no surprises at all. Same goes for track tension adjustment mechanism, which is on the idlers in the front.
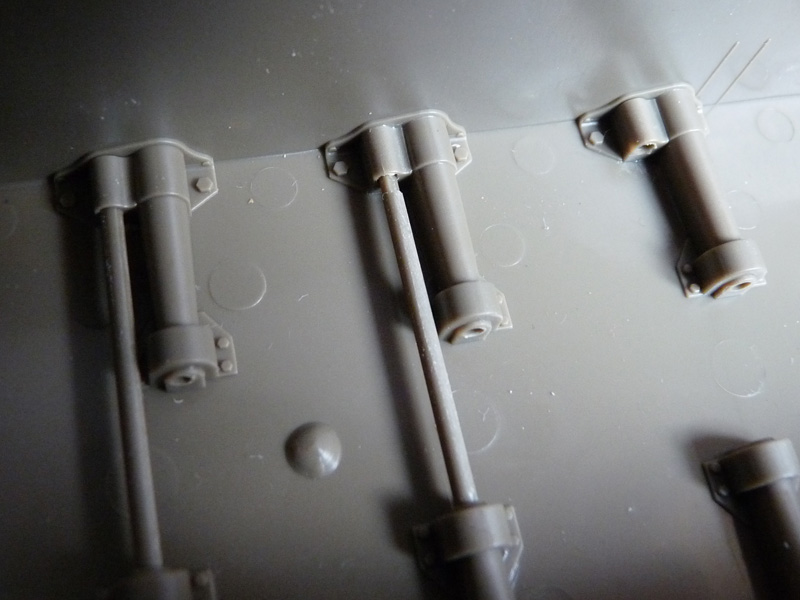

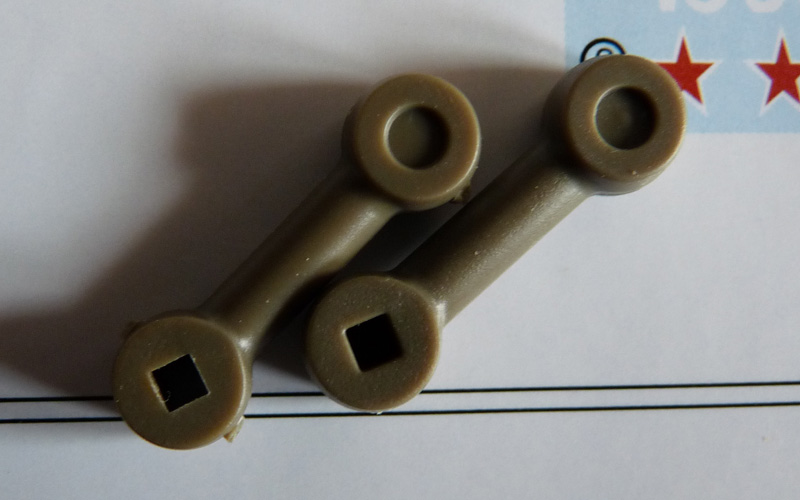
The plastic in the kit is very easy to work with, yet there’s some minimal mold shift and many parts exhibit seam that has to be cleaned up. The amorphic properties of the plastic are most noticeable when you add the suspension arms – no two are aligned the same way. On the last two pictures above you can see the early (right) and late (left) type of suspension arms. Note the opening for the torsion bar opening on the early example is visibly bigger – I used strips of 0,25mm plastic to shim them so they sat properly.
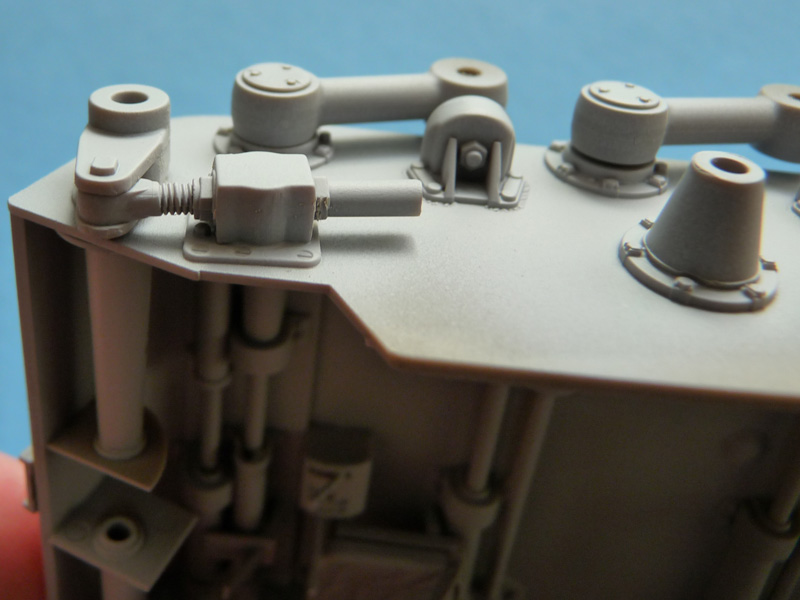
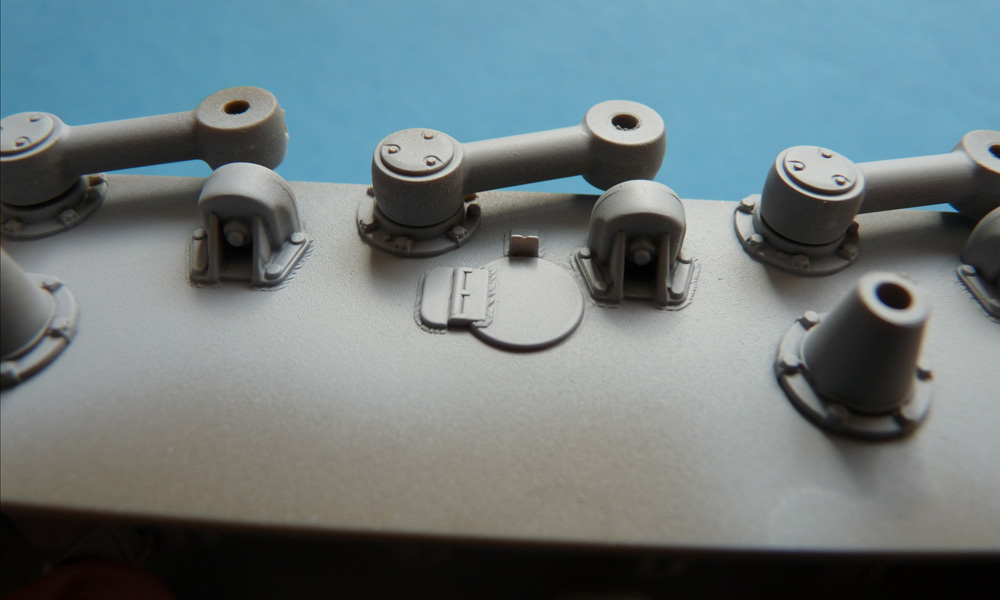
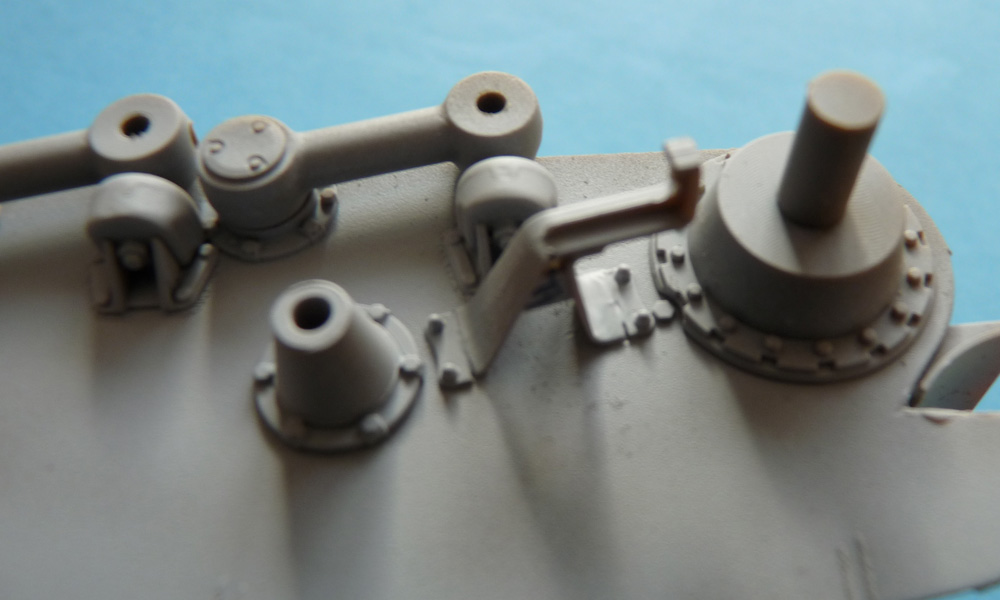
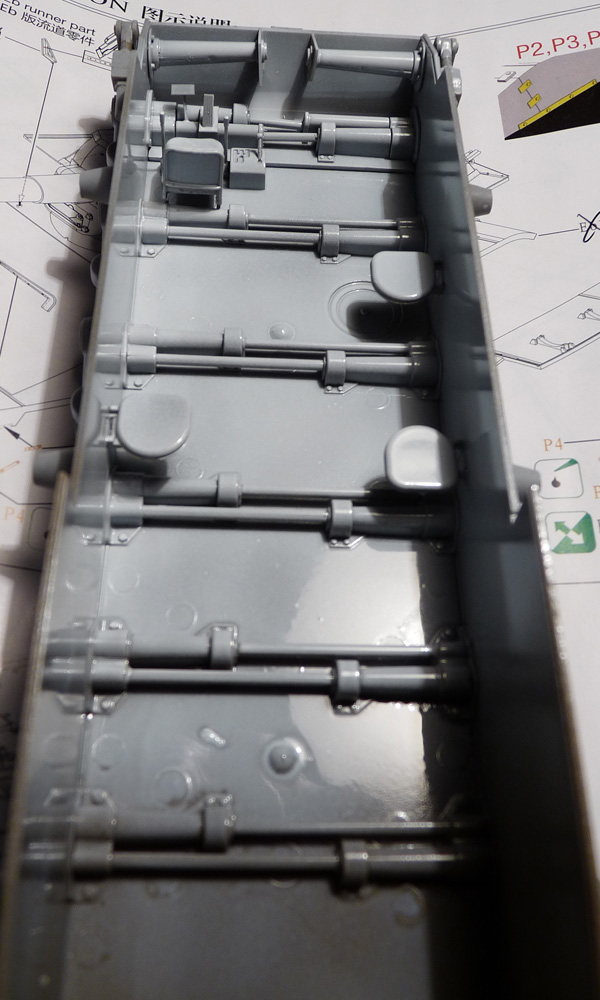
Below you can see the basecoated suspension, the conical supports for the return rollers, the final drive covers and the mudscraper on the right side. The mudscrapers are made up of a single detail each. Two types are provided in the kit, and they both need careful cutting out of the sprues to prevent damage to their fine details.
The hatch in the second image is used for ammo loading.
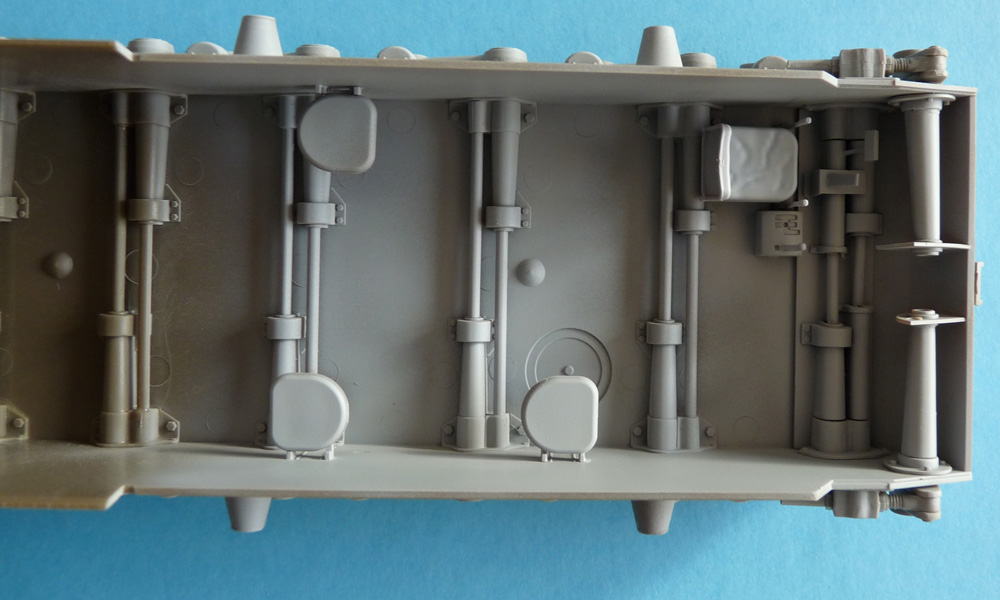
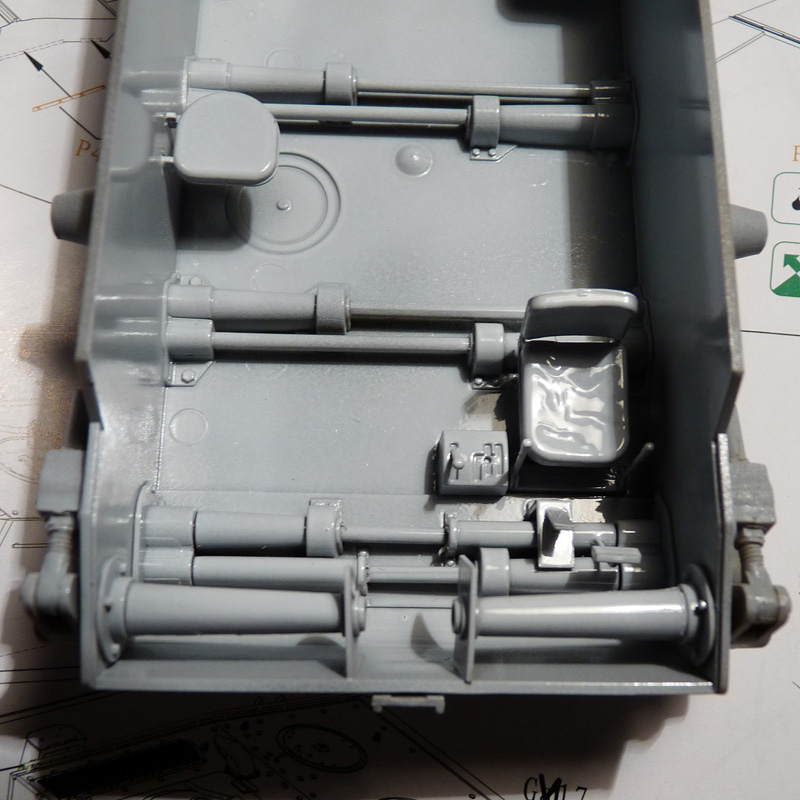
There’s little interior detail beyond the suspension. The driver’s seat is something you will never see again after closing the hull, so don’t bother with detail painting it.
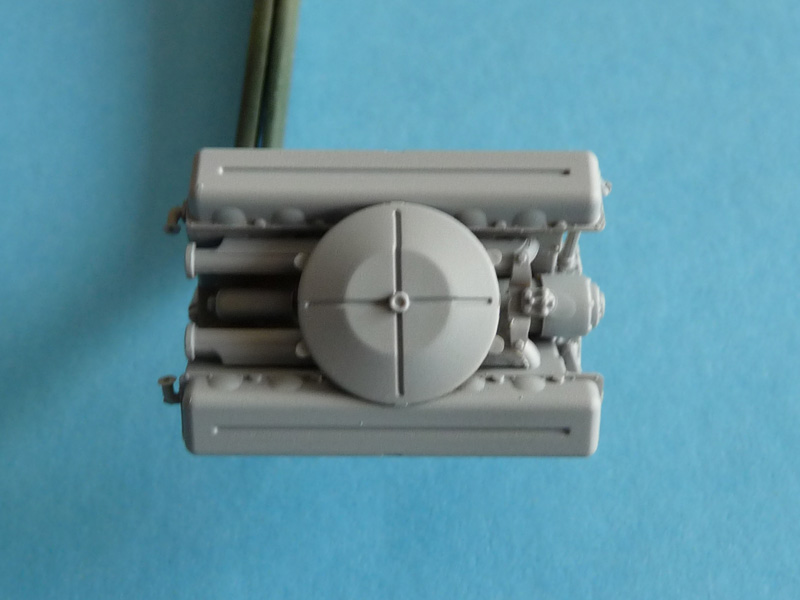
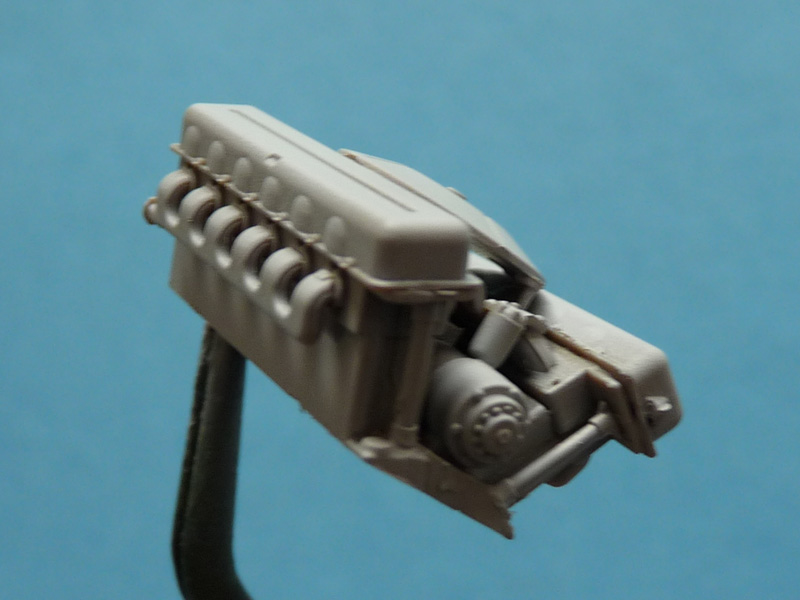
There’s an engine included in the kit. Thanks to the separate engine hatch you will be able to display it. It’s easy to build, although parts require some dry fitting, and some scratch-built detail to actually turn into an engine – especially the wiring/plumbing. As you can see the exhausts simply end nowhere, there’s no gearbox and final drives either.
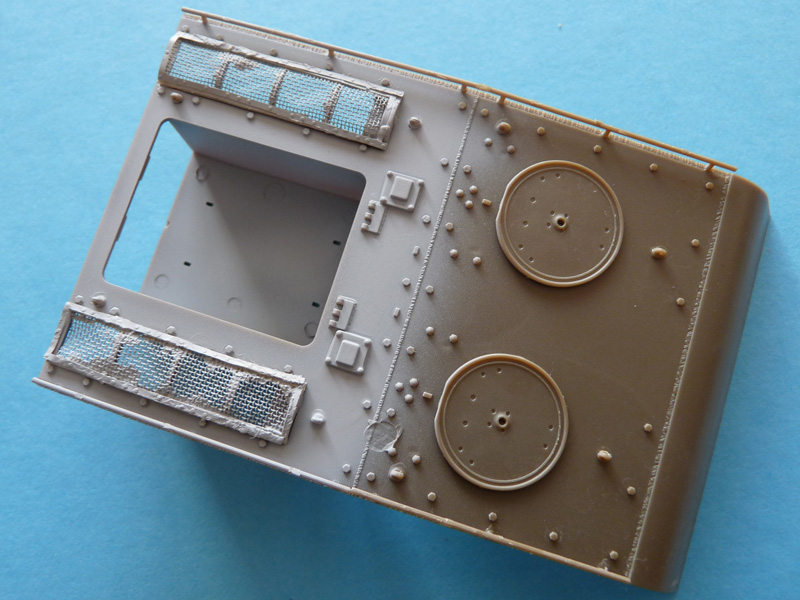
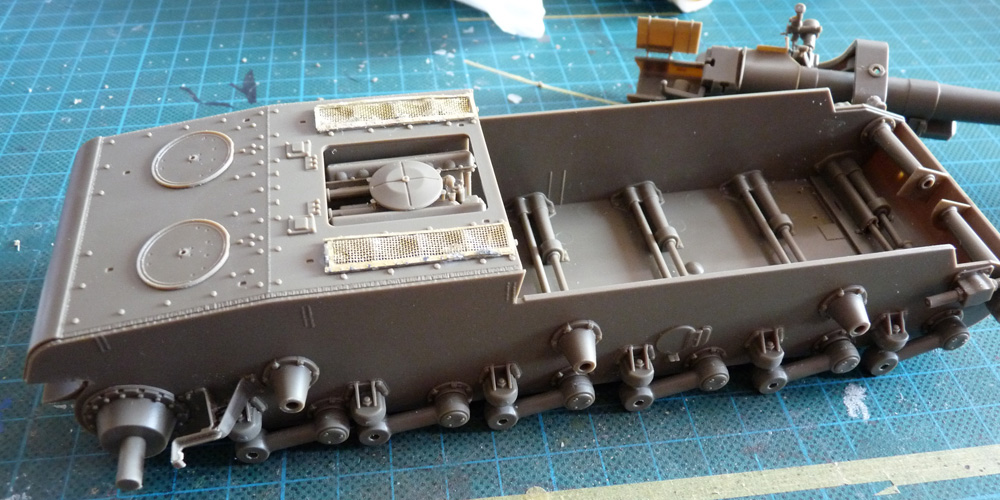
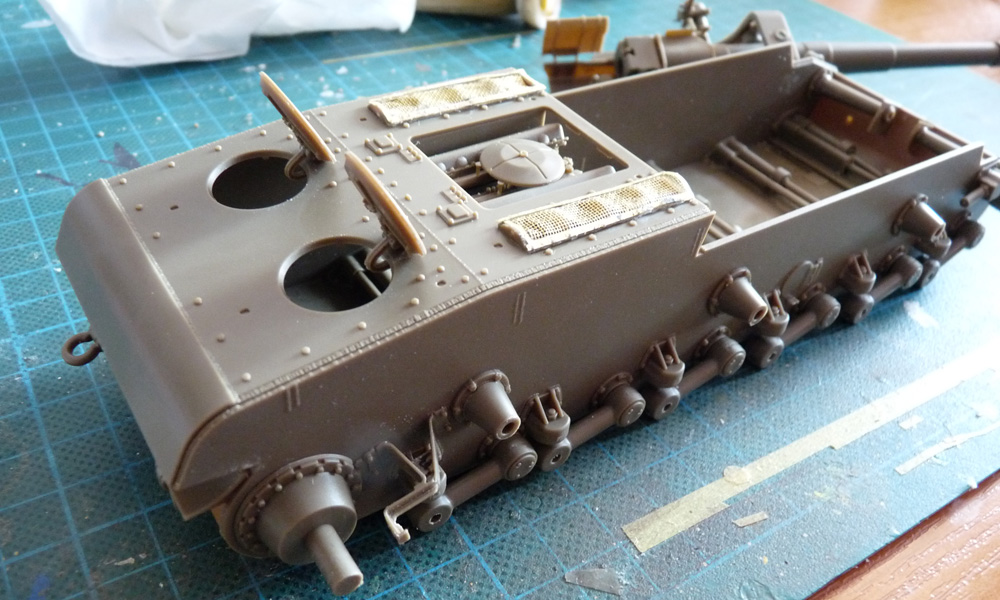
Despite the mesh-covered intakes there is nothing inside them. The mesh screens themselves are an intricate multi-layered construction, made of a piece of PE mesh and three layers of PE frames. This entire sandwich is draped over a plastic frame with three ribs. Good news: you can shape the mesh as if it was walked over countless times. Bad news: PE parts can be easily torn because of the thin material they are made of, especially the mesh itself.
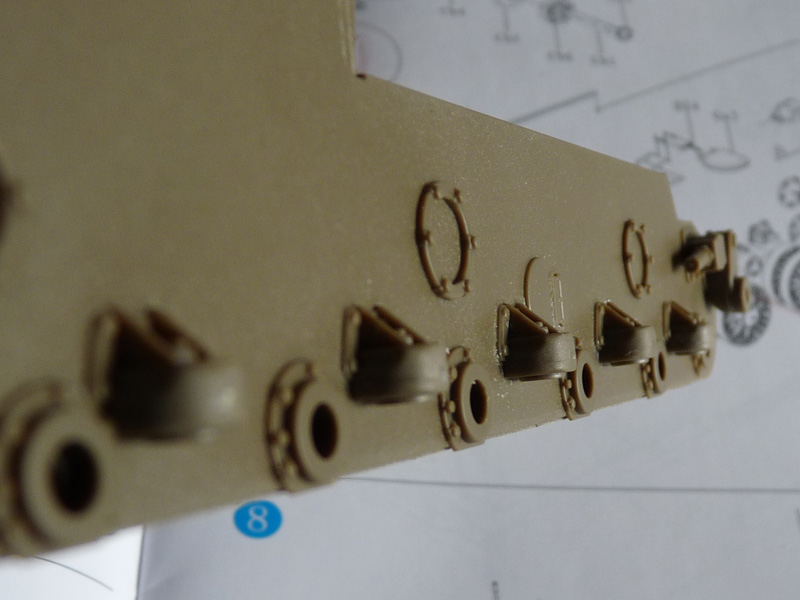
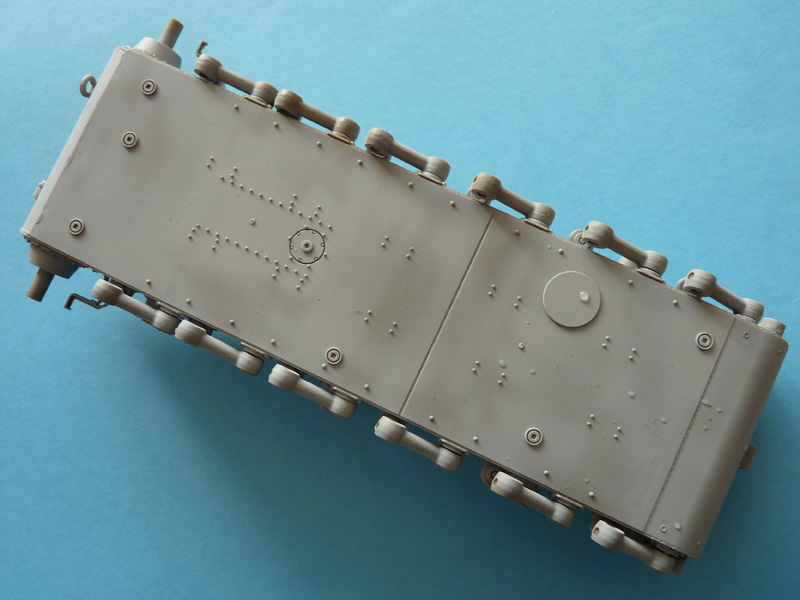
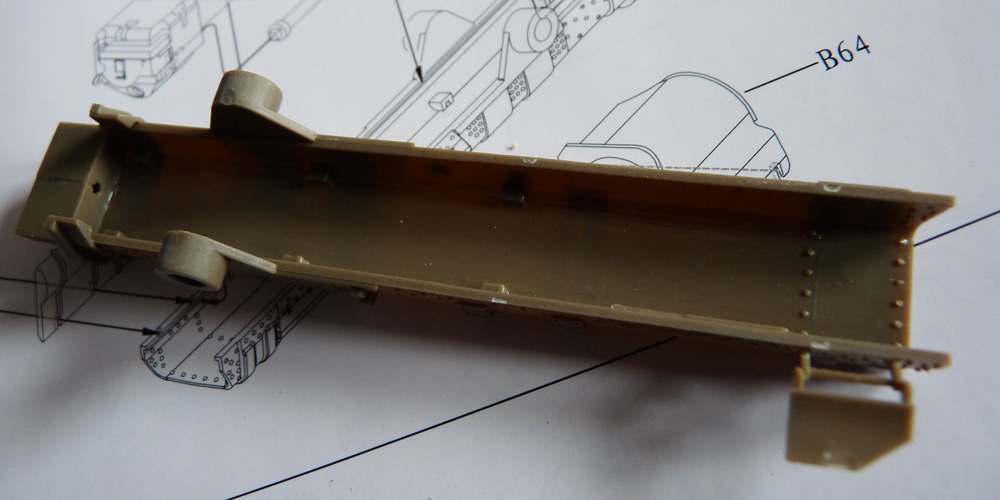
The rear part of the engine deck is occupied by the two circular hatches. There are working hinge parts, that act just like on the real deal – you can pose them as long as you have something to put something underneath them. The last image of the batch shows all the bolt detail at the hull tub.
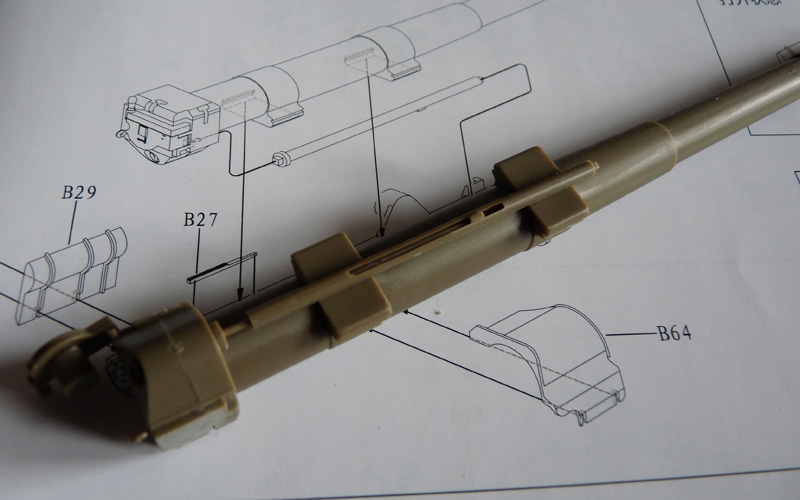
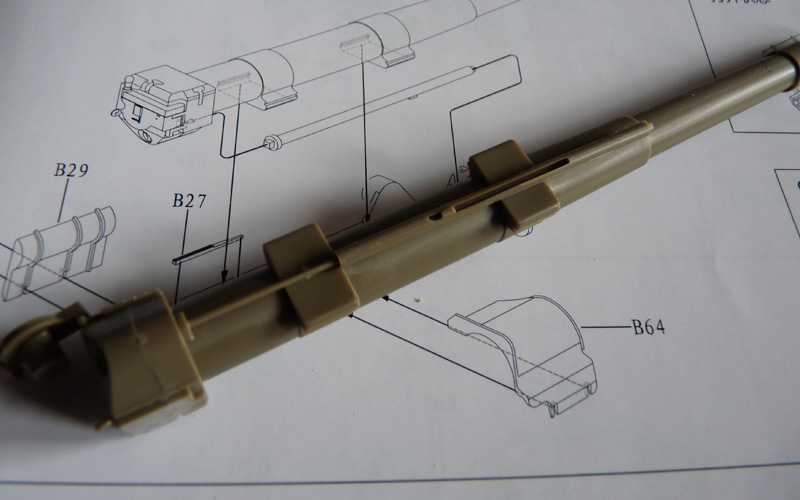
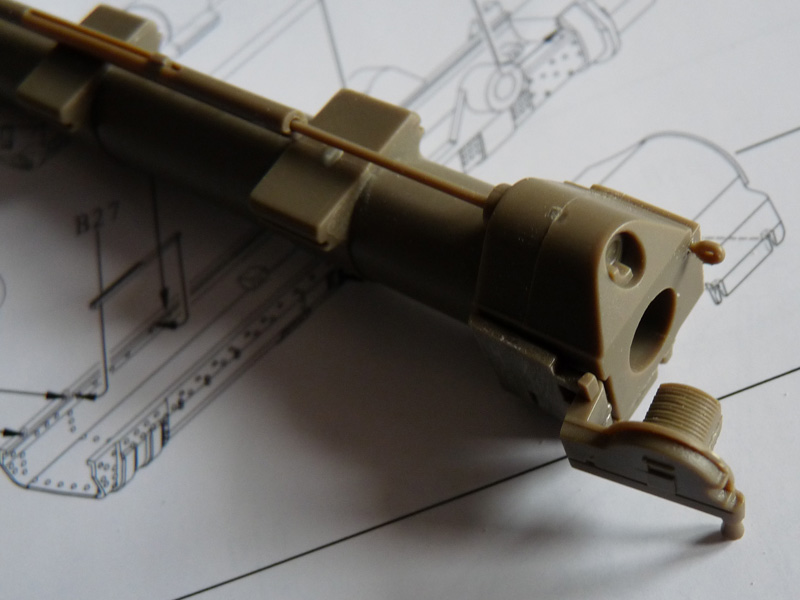
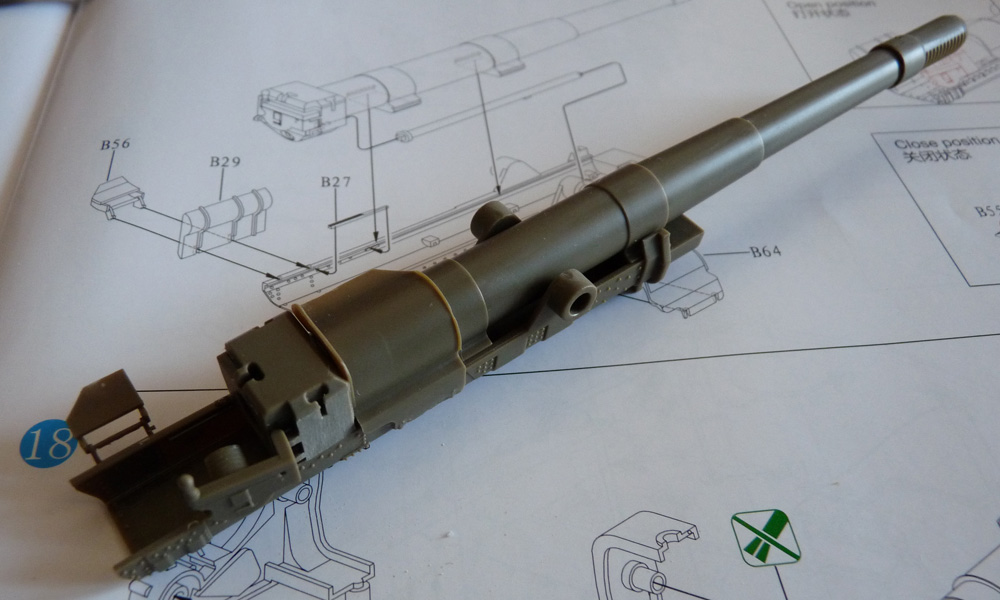
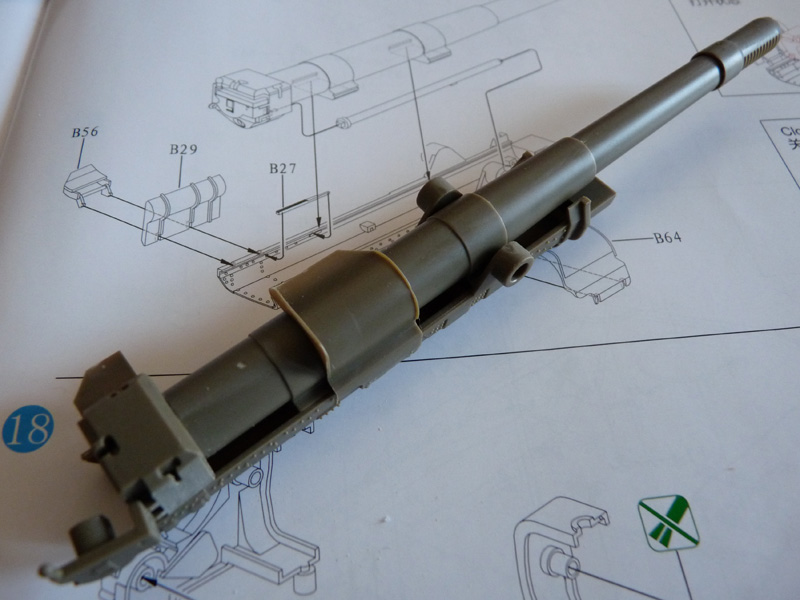
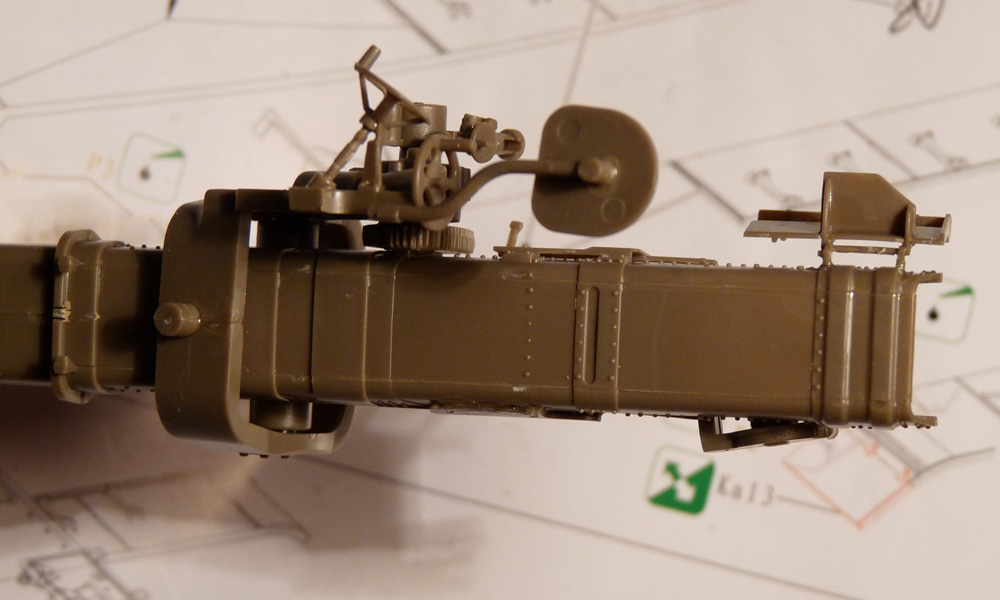
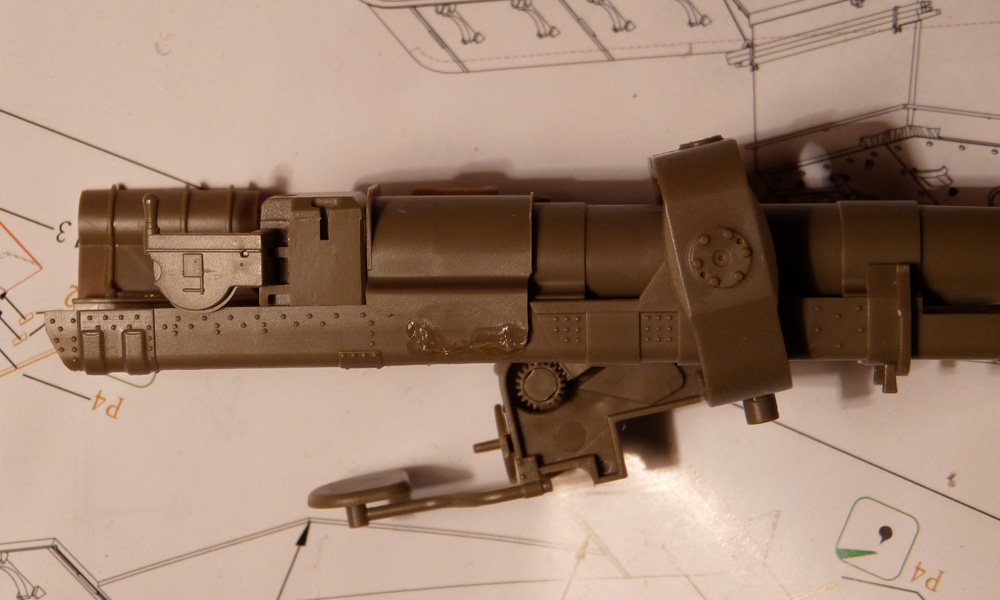
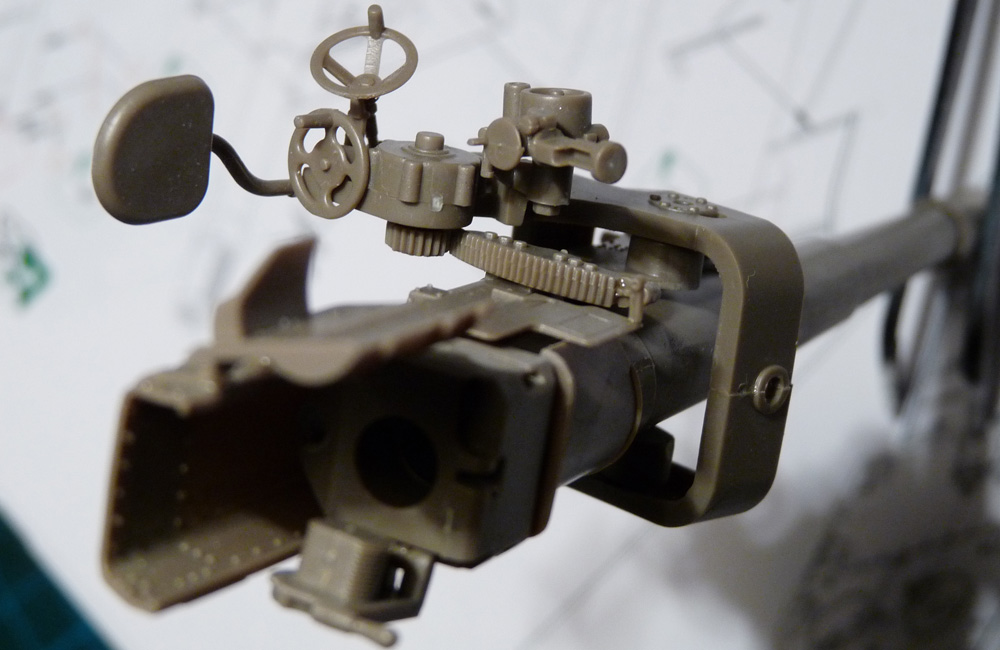
Onwards to the gun. The barrel is a single casting that also includes the two guides for the cradle, which greatly helps with alignment! There is a nicely detailed breach assembly at the back and a recoil recuperator below the barrel.
-
- ML-20 Minimum recoil
-
- Max recoil
-
- ML-20 Rear end, bottom view
The entire barrel assembly is them slid onto the gun cradle. If you elect to not glue the barrel you can display the ML-20S in action. See below 🙂
-
- ML-20S gun cradle
-
- ML-20S barrel mounted on the cradle
-
- ML-20S at max recoil on the cradle
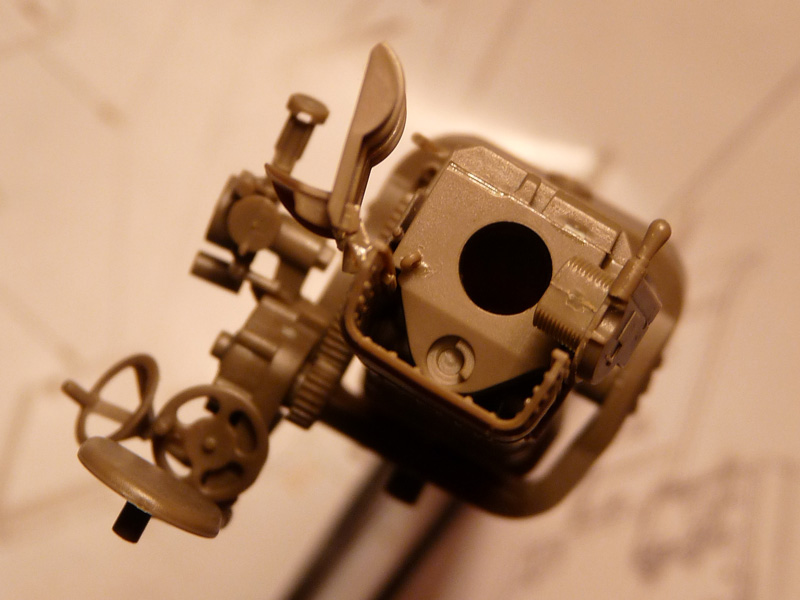
To attach the ML-20S to the vehicle, a sort of collar assembly is used, that helps with elevation/depression and side deflection. The gunsight and the gun laying mechanism are all attached to the “collar”. Bronco does have most of the parts for the gunner’s station in place. There is also a gear that matches the teeth of the semi-circular rack – when you elevate or depress the gun barrel the gear will actually rotate.
-
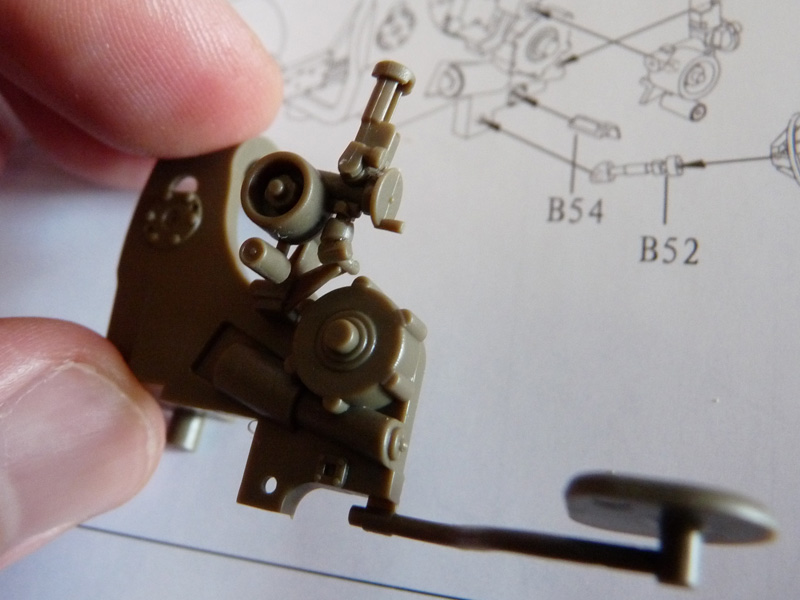
- Gunner’s workplace
-
- ML-20S seen from the bottom
-
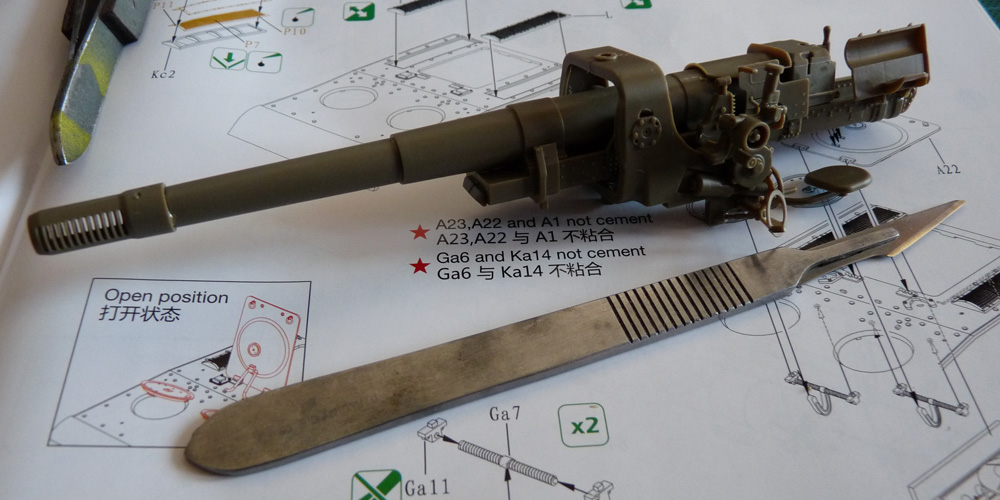
- ML-20S assembly compared to #3 scalpel
-
- Gun depressed
-
- Rear view
-
- Elevation/depression gears
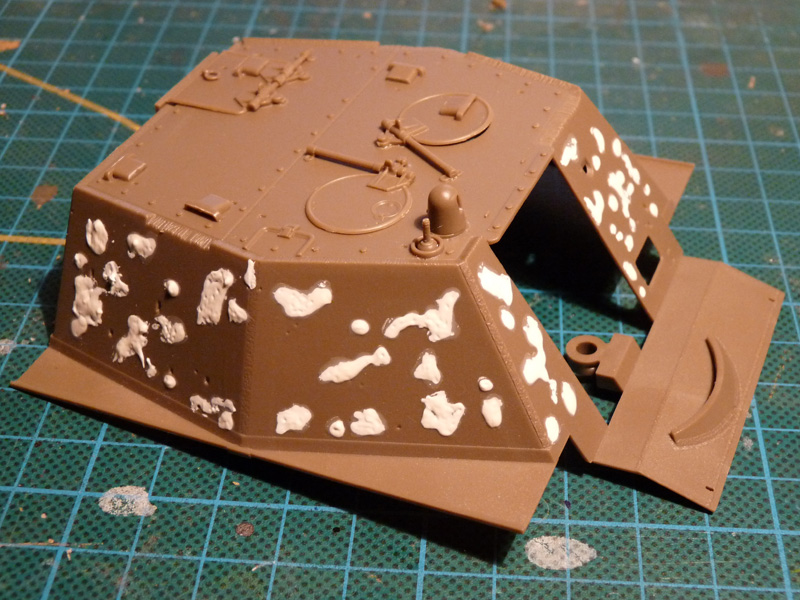
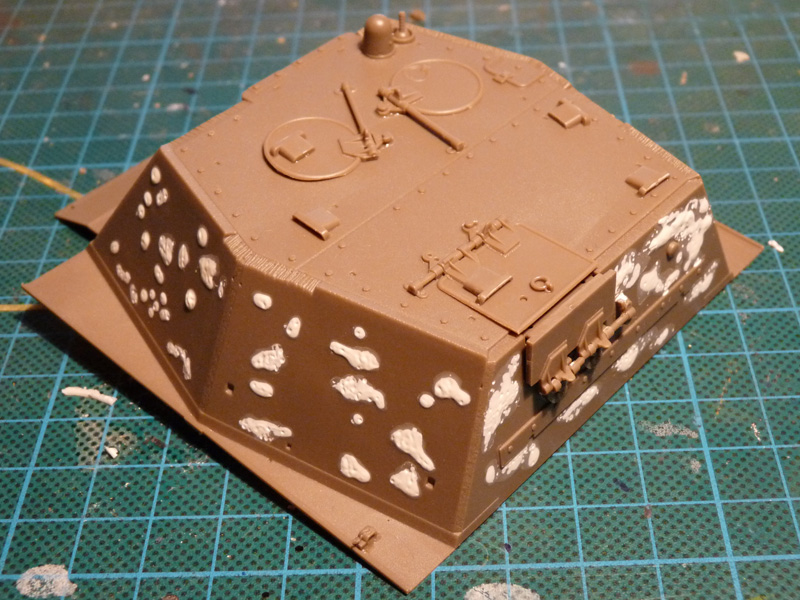
A significant letdown of the kit is the simulated raw cast texture of the superstructure. The casemate of the SU-152 was actually welded together from rolled armor sheets rather than cast as the turrets of T-34/85 and IS-2 tanks. I filled the holes on the sheets with Mr. Dissolved Putty, filed it down (admittedly the result is far from perfect) and primed it with Mr. Surfacer 1200.
-
- Mr. Liquid Outty spread over the “cast texture”
-
- More putty
-
- Mr. Surfacer 1200 sprayed over the casemate
-

- Casemate attached to the hull
-

- Gun assemly in place
-
- Mantlet added
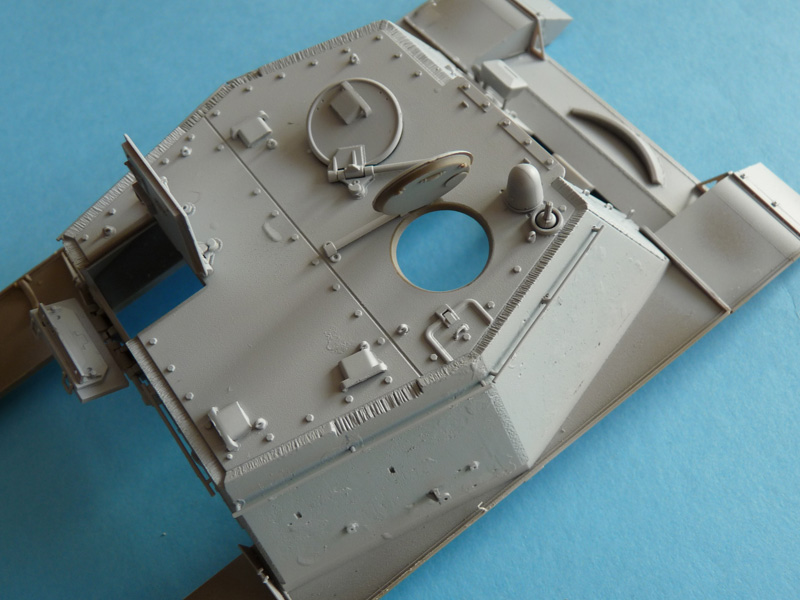
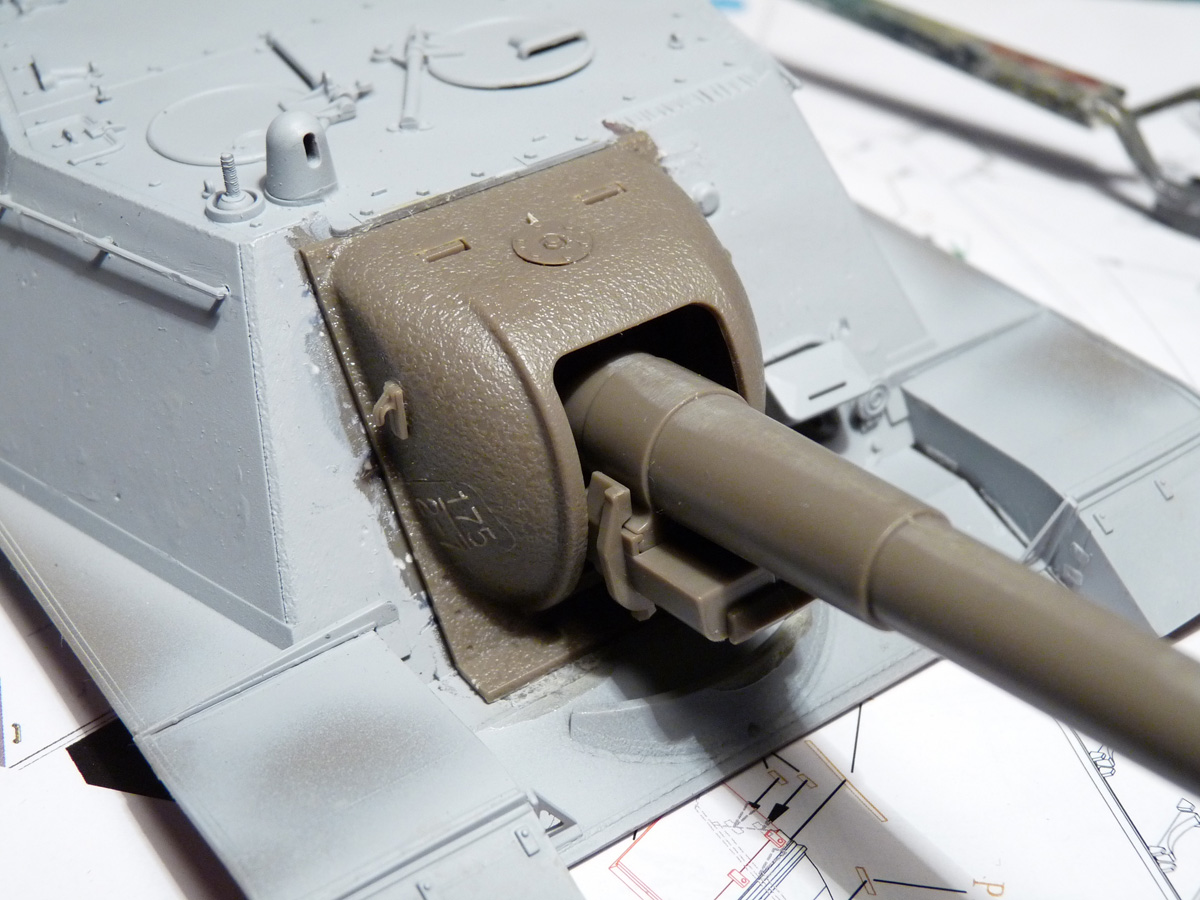
The complete assembly fits with no issues to the hull, so I took to dry-fitting the big gun. I had to split the lower lip of the mantlet to make the cradle go through. The smaller cast armor piece is then simply slid into place, fitting over the pyramid-like shape at the extreme tip of the gun cradle, seen under the barrel on the last two pics. You can also note the extended driver’s vizard with the rain guard over it, the electrical horn next to it, as well as the plug for the gunsight opening above them.
There is a noticeable effect on the armor sheet edges: Bronco has simulated the traces from the gas cutter, used to cut the armor to shape. With a bit of highlighting this can bring up the raw nature of the prototype into the model as well.
Some work in the wheels and tracks dept.
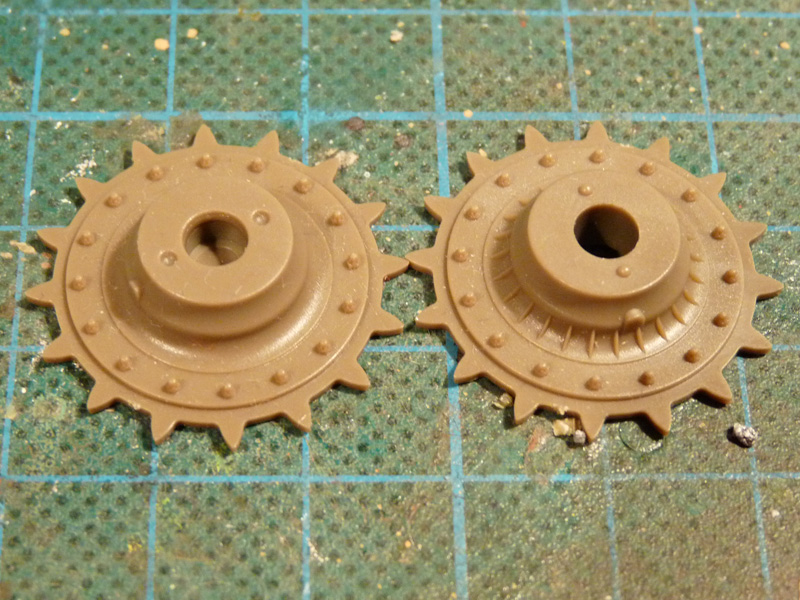
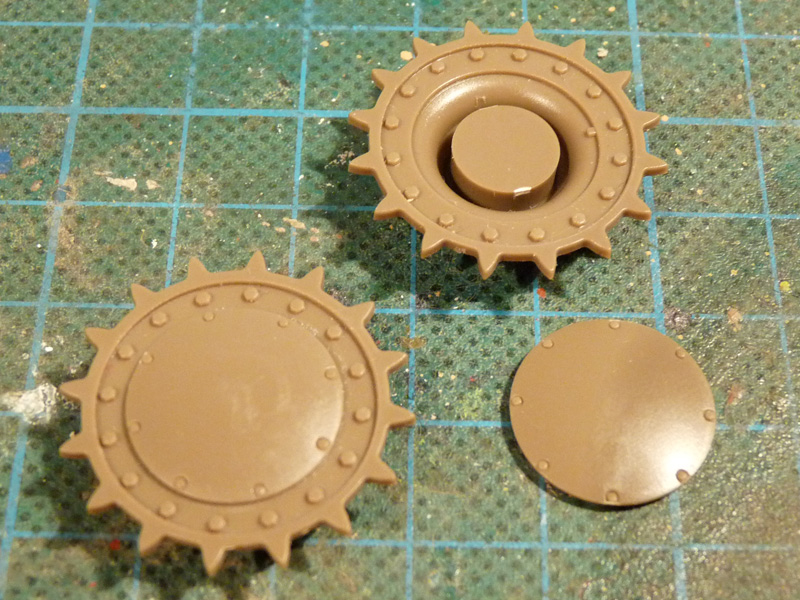
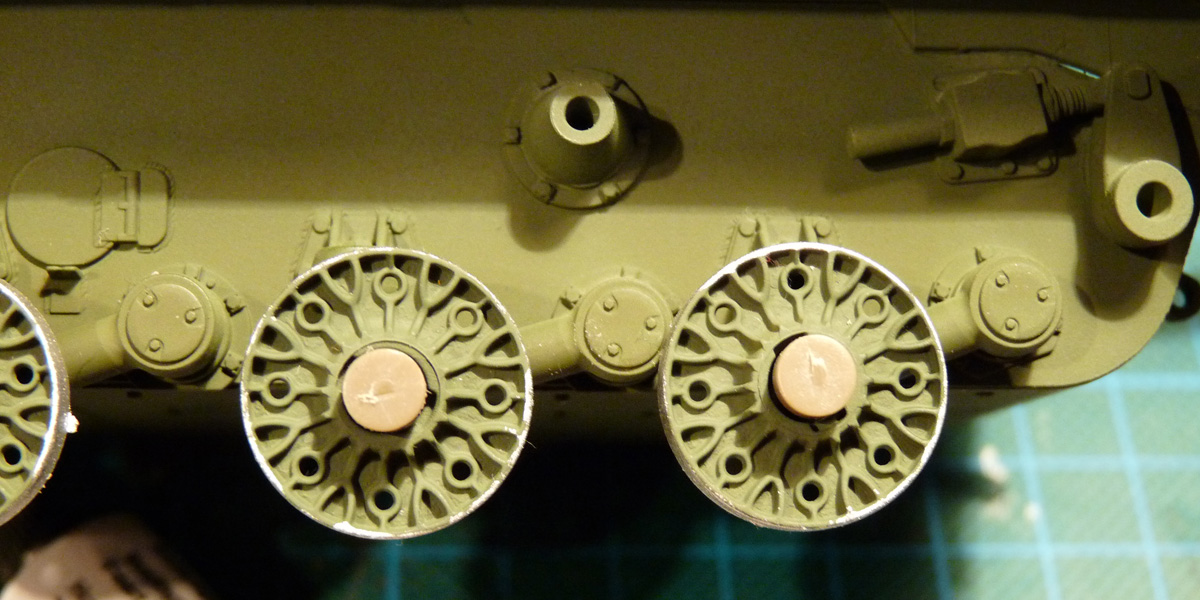
On the images below you can see the sprocket halves with detail on both inside and outside surfaces. The outer half in the kit also holds a plug that the sprocket shaft fits into, allowing the wheel to rotate. There is a circular cover just like on the real deal.
-
- Sprocket halves
-
- Outer sprocket half before and after assembly
-
- Return rollers
-
- Idlers before paint
The return rollers and idlers can also be rotating freely if the modeller so wished.
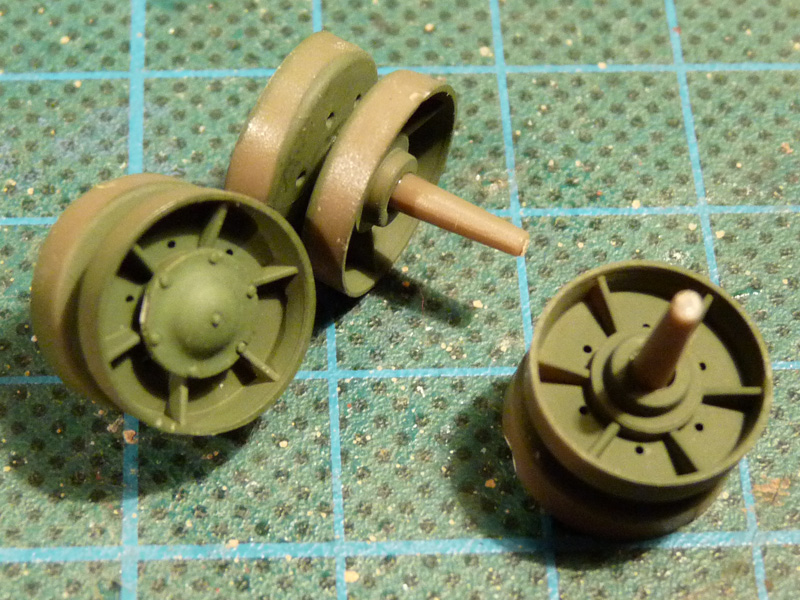
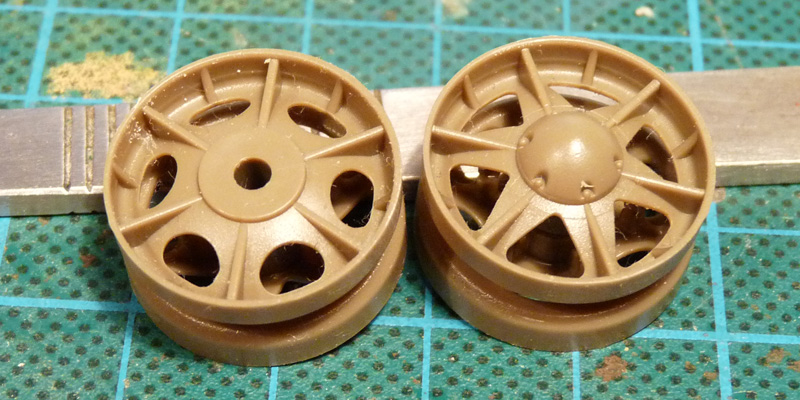
Next are the roadwheels, which are also made up of two halves each, and an axle, too.
-

- Roadwheel halves
-
- Inner halves pinned to suspension arms
-
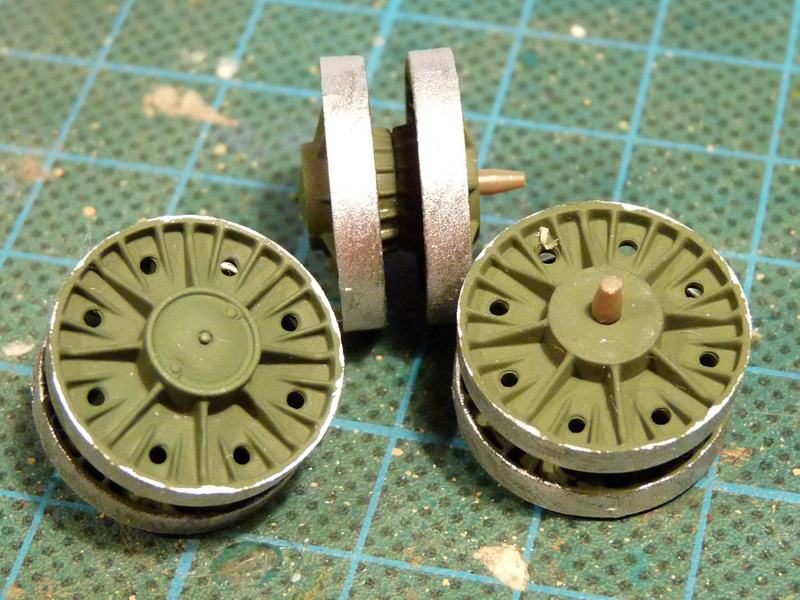
- Wheels built
-
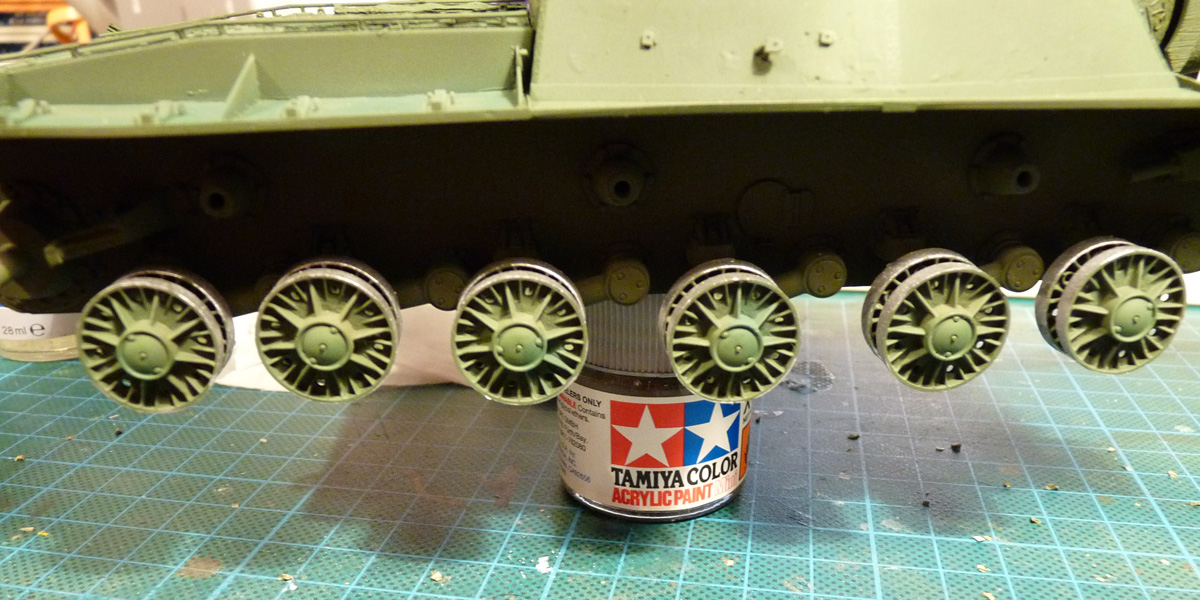
- In place
-

- Left side, complete with return rollers
The tracks in the kit are made up from individual links. Every 2 links are connected via two pins, one on each side. There are actually 2 pin types on each pin sprue (there are 13 of them). I just went ahead and used all pins one after the other, regardless of type. Below is the result.
-

- A full track run (center) and 11 segments with 8 tracks each
-
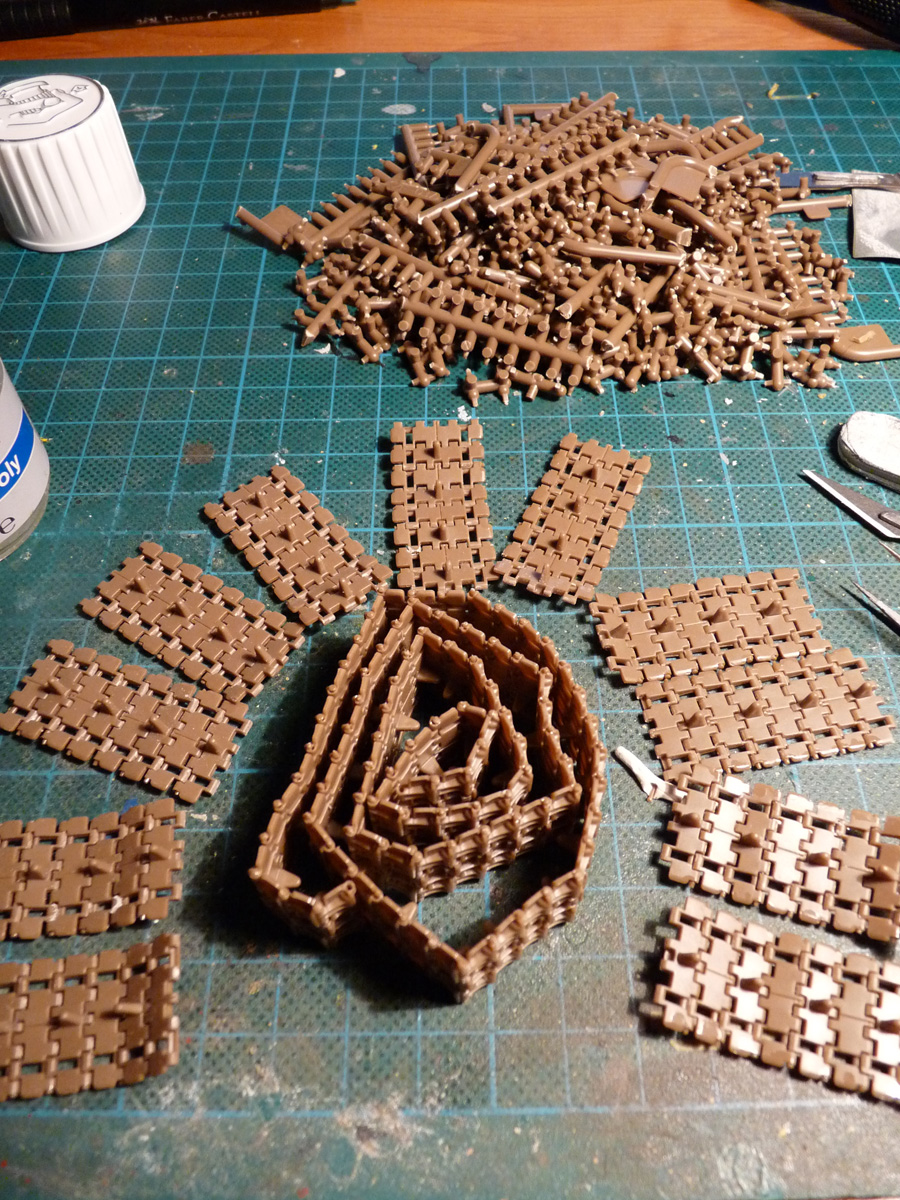
- Same image + leftover sprues 🙂
-
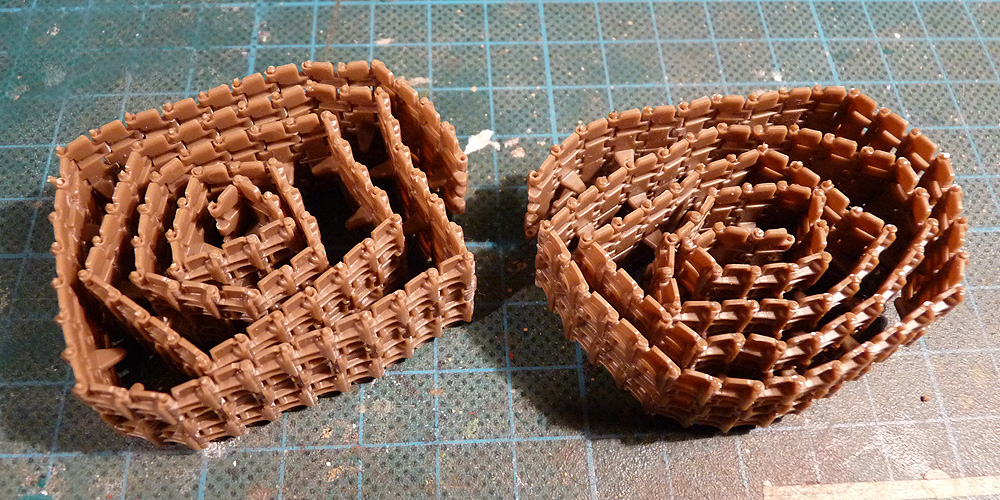
- 2 complete track runs
-
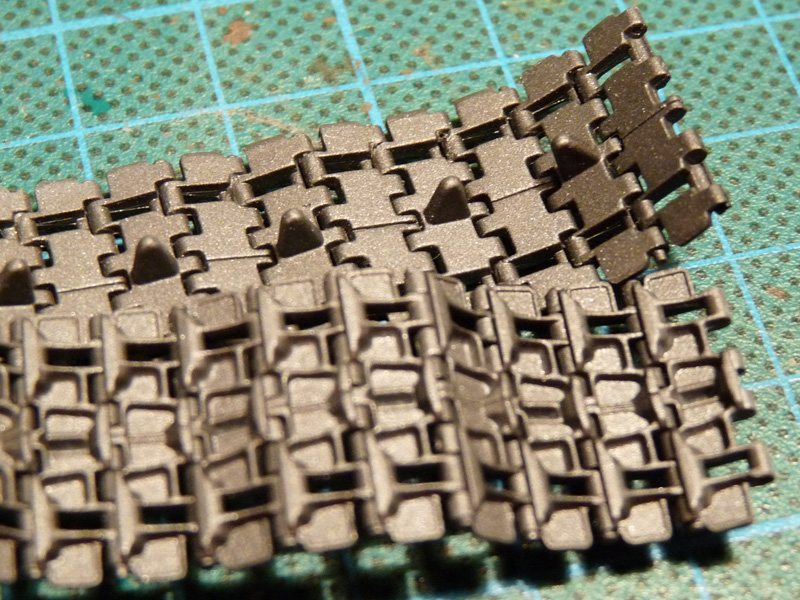
- Painted
-

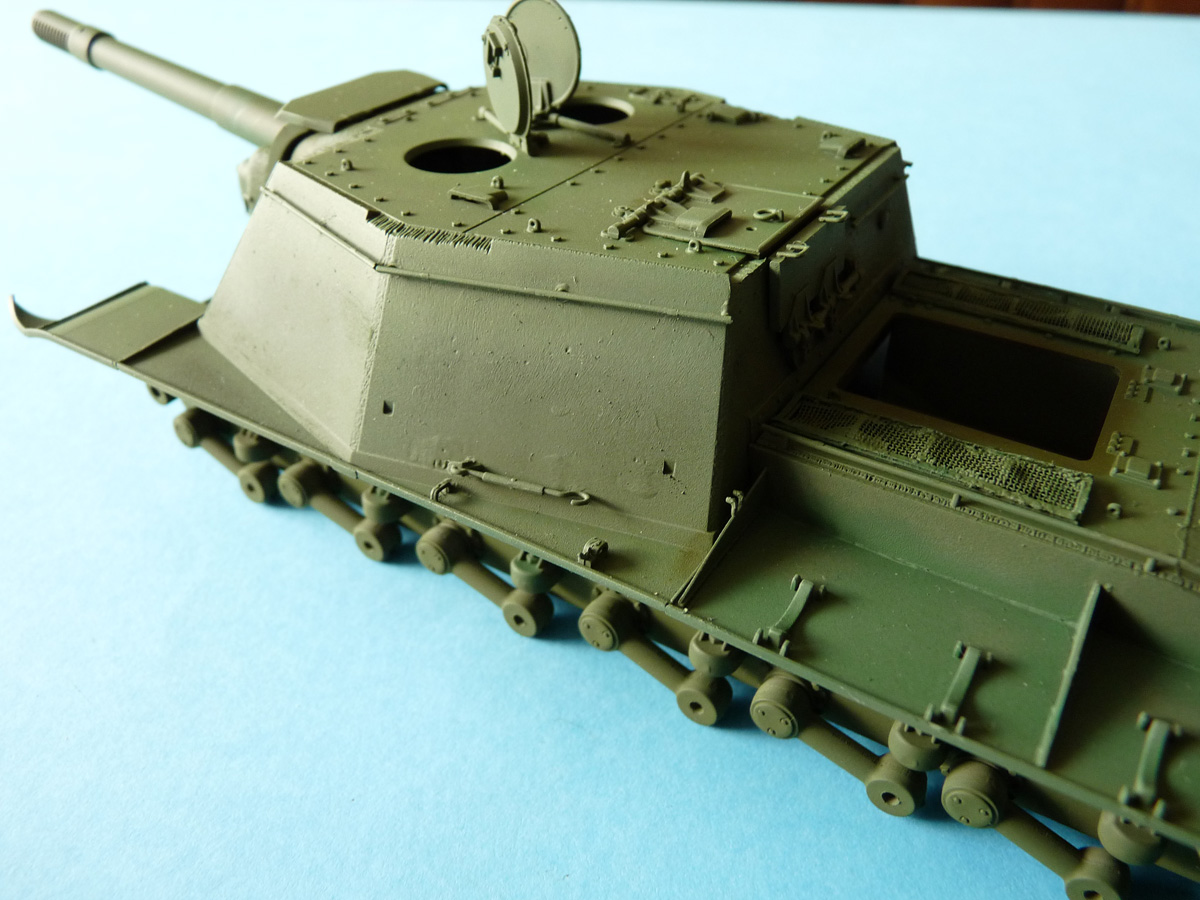
- Track in place
You’ve already seen the partly painted model, so here are a few more shots.
-

- Overall view
-

- Engine deck with highlights
-

- Supertsructure with hatches open
-

- Hatches will be painted white inside. Note color variation on the gun.
-
- Working towards the rear
-
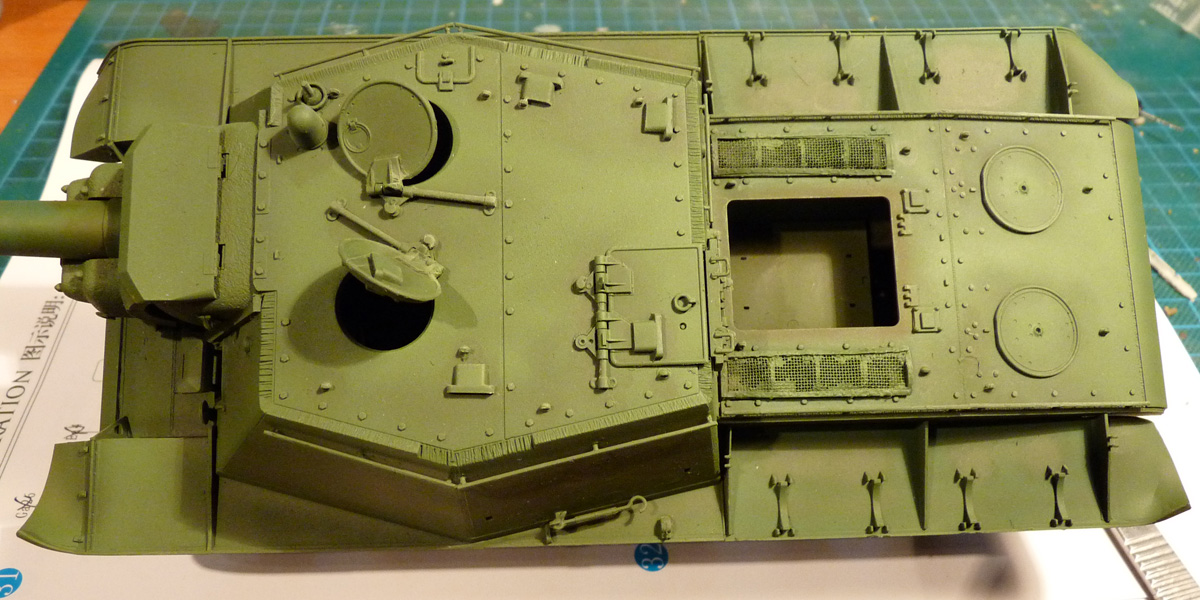
- Top view