The Jagdtiger was a last-ditch weapon, a self-propelled anti-tank bunker, that had zero impact on the outcome of WWII. Regardless, a lot of model companies offer both variants of this machine. My main reason for getting the Trumpeter set with Porsche suspension was the small number of parts and the related ease of construction. It promised a rather uninvolved build as I imagined a straight OOB project done over the weekend. Yeah, right 😀
The first session was promising, I managed to remove the main components from the sprues, clean up and assemble the bogies in a couple of hours. Instead of going full AMS I decided to plug the locating holes for the spare track hangers, and go “bald”.
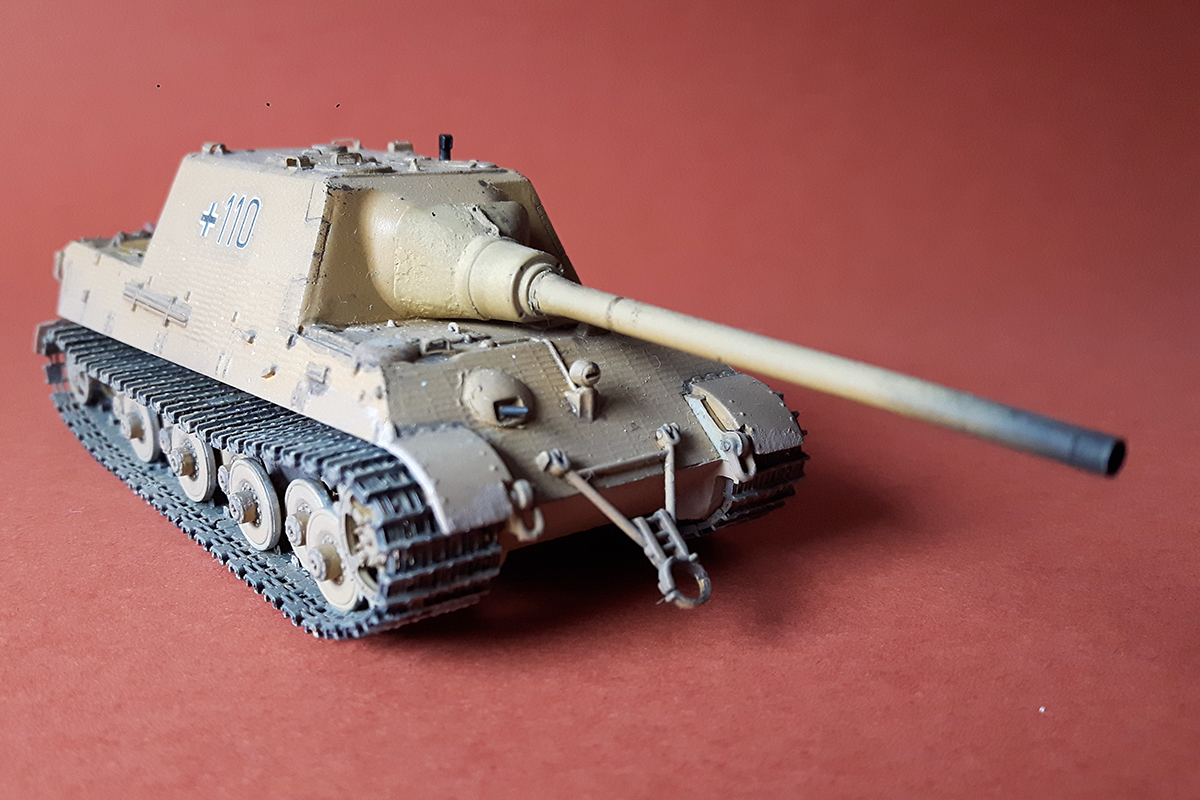
Using OKB Grigorov’s resing parts has been very easy. In fact with the help of a hair drier I was able to bend the track run around the wheels and get some sag on the track. The track run retained its shape so well it could hold the wheels in place with no glue whatsoever!
After the track was painted I started weathering the wholes assembly, and added some “volumized” mud on the hull, which requires some pigment powders to look like the real deal (dry mud).
A small detail – Albion Alloys copper tube used for the exhaust pipes:
OK, after showing what’s in the box let’s see how to build this beast of a kit.
First, I glued together the hull halves and added the main fenders. They are way too thick for the scale and after being measured were chopped off.
Next step – fill the trenches where the former fenders join the upper hull, and sand the sides down until they are smooth.
Hull filled and sanded
Details will have to be restored…
Fabricate the new fenders from scrap metal – here 0,1mm brass sheet cut to size and bent. The bend is sort of uneven, which is fine considering this is a tank.
While the Squadron putty was drying I cut the nose of an ESCI FFAR pod:
FFAR pod nose cone cut
and inserted the base into the inlet of the APU to give it some detail.
Stock engine/APU intakes
Here’s how the outcome looks before paint:
New detail added to the APU intake
The amount of putty required and the sanding is obvious on the series of pictures above, but let me tell you – this is a great stress-relief technique.
I also created a new gun mount to replace the missing part, using brass barrels of a design closest to the original GSh-30. These are fixed into a block of laminated styrene. The white brackets are scrap styrene sheet.
I built this kit for a group build in April this year. My goal was to finish the build in the shortest time possible – it was intended as a kickstart after for quite some time I did not finish a kit.
The basic airframe used has been an ancient ESCI release which I bought dirt-cheap from a guy that regularly renews his collection. He had used certain parts from the kit, the gunpack included, so I was up for some scratchbuilding fun.
I started with the cargo hold doors, which were rather thick. I had to thin them around the edges in order for them to fit.
The last pic in the previous post shows I forgot to add the PE plate between the upper hull and add-on armor, so I had to add it and paint it separately. Hatches and and some small details were added next. I then proceeded to spray the brown spots using diluted Revell brown under very low pressure. MM Burnt Metal was used to detail paint the S-hooks, tank jack, etc.
The decals were fixed using Mr. Mark Softer.
The wheels were added next, then the right side track run was superglued on. To my horror it turned too short, so I had to stretch it with most of it already stuck on the model. It ain’t a particularly pretty sight.
Oh yes, you knew that was coming as it’s a patter of the way I’ve been publishing recently. I feel it’s only logical that the articles are presented in this sequence despite my modelling not following it exactly as there are always multiple projects on the bench.
This one is bit odd, as I started separating pieces from the sprues the moment I set the camera aside. I knew it should take me a minimal time to build the little tank and deliver a hopefully useful review to Armorama, who kindly supplied the kit.
It’s finally done. After the splattering nozzle my masterful hobby-time organizational skills delayed this pic set.
Tracks: as most of them is rubber – Revell 78 was used to mimicking the areas. Glued over the wheels (sand center + 78 again for the rubber bandages) with Loctite gel. Inserted Q-tips to provide the sag – worked like a charm!
Cupola vision blocks were done the following way:
– the recesses were brushpainted Tamiya XF-11;
– Revell enamel transparent blue was mixed with their own gloss cote and painted over the XF-11;
Alright, it’s been a while since I started this kit, and the source of the delay has been the overspray due to cracked airbrush nozzle. While waiting for a replacement I replaced most of the detail on the top.
I removed the antiskid plates (don’t ask – don’t tell) and re-did the antislip coating only. Few of the original plastic handholds are still in use, most were replaced with wire – as were the DML PE parts, since most were too flimsy and two-dimensional. I also added the rope tie-downs at the 4 corners.